Browse the glossary using this index

Special | A | B | C | D | E | F | G | H | I | J | K | L | M | N | O | P | Q | R | S | T | U | V | W | X | Y | Z | ALL

Page:  1  2  3  4  (Next)
  ALL

A

Activity block

To embed an activity block


  • Add a label or Edit an existing label.
  • Expand the text editor toolbar and click the HTML icon </> to edit the HTML code.
  • Copy and paste the HTML code below.
  • Click the HTML icon again to exit HTML edit mode.
  • Add your activity instructions inside the coloured block.
  • Save and return to course.

Activity

HTML code:

<div class="aBlock-activity">
<h3>Activity</h3>
<h4>Activity Title</h4>
<p>Description of activity</p>
</div>

See also:

Sample usage:

  • Perfect to house a Week 1 activity where students are asked to introduce themselves in a forum

Activity or Resource 1 (Add)

  • To add any new content, use the Add an activity or resource link at the bottom of each Section or Topic

 add an activity or resource.

  • When clicked the menu of all activities and resources is shown.

activity and resource menu.

  • From here you can click on the activity or resource you wish to add. 
  • The activity or resource will be added and you will be taken to the edit setting page to adjust as required.

For more information see:


Activity or Resource 2 (Indent)

Mainly for use when you want an activity or resource to appear related to/part of an item above.

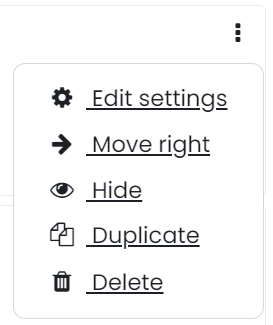
  • Click on the three dots menu three dots menu on the right of the activity or resource 
  • Select the Move Right option.

Edit - Move right.

For more information see:


Adding / Embeding Video

YouTube videos:

  1. Add/edit a Text and media area
  2. Add the Video Activity Block
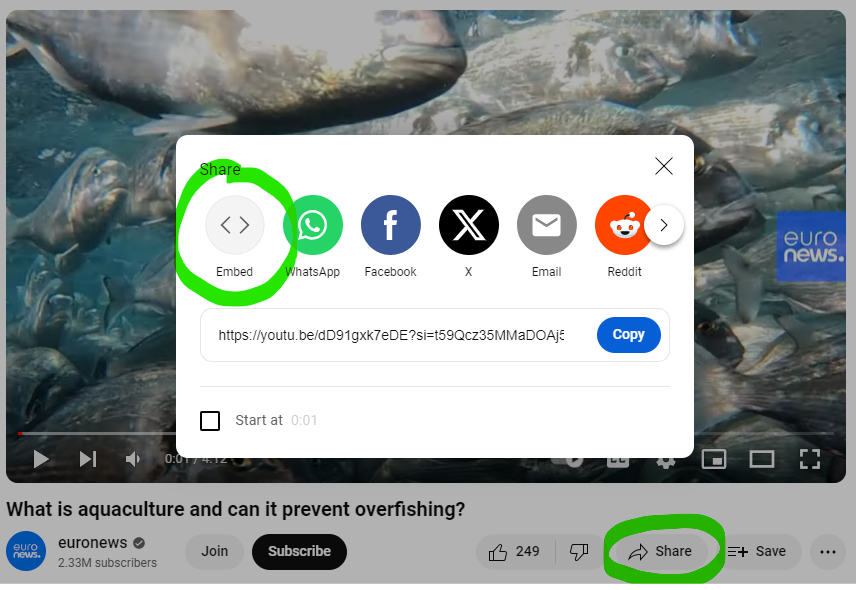
  3. Find the video you wish to embed and click on the Share button.
  4. Click on the embed option


  1. Copy the embed code
  2. Click on the HTML code button
  3. Paste it under the <p>Description of activity</p> code
  4. Click on the HTML code button again to return to the normal view and check the video is displaying correctly.
  5. Save your Text and media area

Announcement 1 (create)

To create an announcement


  • Go to the Announcement forum in your course. By default, it appears on the Home/Welcome page.
  • Click to open the forum, and then click Add a new topic.
  • Title your announcement and type your message to students. Note that you can also attach a file.
  • Click Post to forum.
See also:
  • Announcement 2 (edit or schedule)


E

Editing an Activity or Resource

  • All activities and resources are edited in the same way, by selecting the three dots menu three dots menuon the right of the activity or resource
  • Then selecting edit settings


F

File 1 (add)

To add a file (e.g. PDF)

  • Go to the course page where you want the file displayed.
  • Click Add an activity or resource (bottom right).
  • Choose File.
  • Follow the prompts to name the file, and to describe it (optional).
  • Select a file to add:
  1. EITHER drag and drop the file from your device into the Select file box. This is easiest.
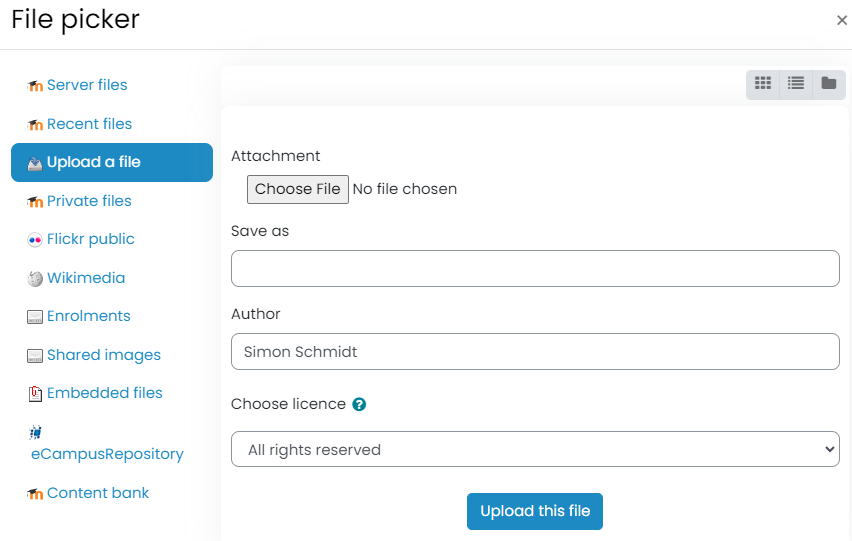
  2. OR choose the Add icon (far left). Then on Upload a file - click on "Choose File" and select it from your computer.

Upload a file.

  • Once you have selected the file(s), check the settings. The default setting are usually what is needed. 
  • Click Save and return to course

Forums 1 (set up)


To set up a forum

  • Go to the part of the course (e.g. page, topic) where you want the forum to be.
  • Click Add an activity or resource
  • Choose Forum from the list that appears, then click Add.
  • Give your forum a name, and a description (optional) Tip: The description might be instructions on what you would like students to use the forum for as they will see it at the top.
  • Choose a forum type, scroll down and click Save and Return to course 
  • OR If you want to get fancy - edit forum settings, then click Save and Return to course.

Sample usage:
See also:
  • Forums 4 (for groups) to set up a forum for different groups of students.


H

Hide or Show Blocks

  • Blocks are the column on the right hand side of our Moodle pages, usually consisting of the Latest Announcements, Tutor Contact Details, Progress Bars, and others added as required.
  • The Blocks column can be hidden or shownby clicking on the small arrow on the top right of the page.
Note: Moodle remembers if a user has hidden blocks or not so, it can create a little confusion for the user if they have previously hidden them and come back again after a while and cannot see them. 

Hide or Show your course to students

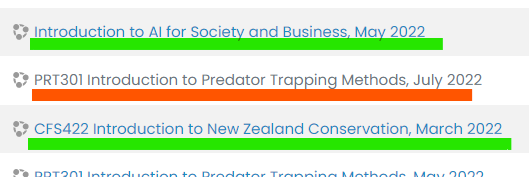
Often when a course is rolled over the course is hidden so adjustments can be made or until the tutor wishes to show it to the enrolled students. A course that is hidden shows up as greyed out on the dashboard and search. In the image below the green courses are Shown to students and the orange is Hidden.

Hidden and shown courses.

Show or Hide a course
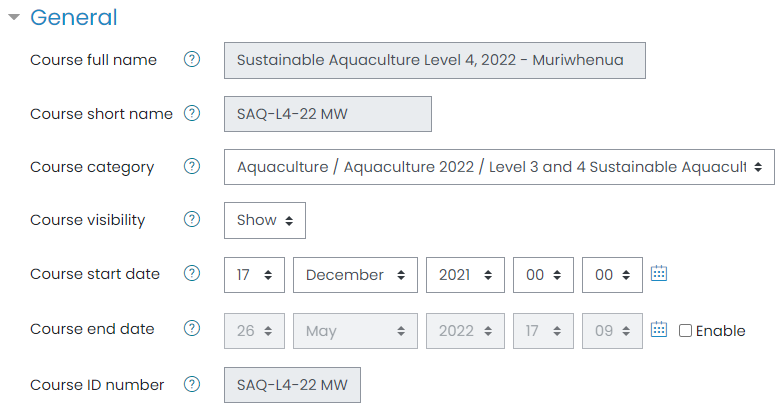
  • To show or hide a course you need to edit the course setting, by opening the course and clicking on the cogedit cog. at the very top right. 
  • Change course visibility to Show or Hide depending on your need.

Course Settings.

  • Then scroll to the bottom and click Save and display.


Page:  1  2  3  4  (Next)
  ALL